
Now that summer is here, it’s time to apply for a summer handicraft show! After 15 consecutive performances in summer, plus a few years of performance in general, I created this final guide to set up your handicraft booth-plus a free printable list to list each show The content of the performance.
Contents
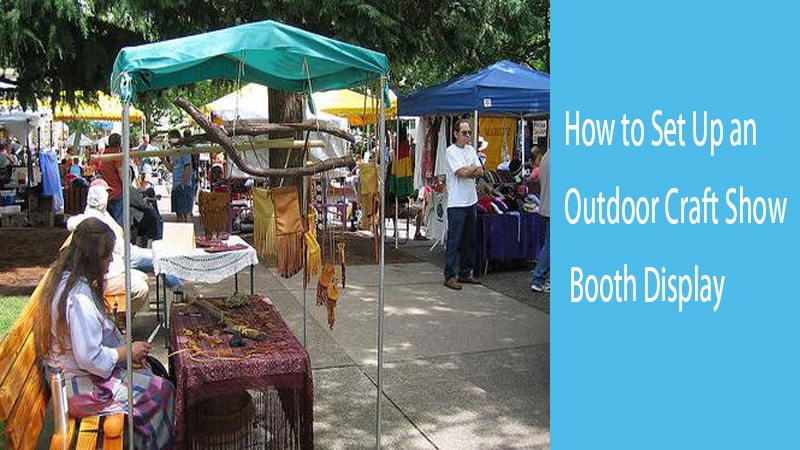
Watch this video “Booth display ideas and setting up at an outdoor show – St. Albert Farmers’ Market – Craft Art Sales”(8 mins 58 seconds)
If you are suitable for one of these three categories, the Art & Craft program may be more suitable for you:
- You are just staring at selling artworks and trying to define your own style and sound.
- You are not interested in selling artworks online.
- You want to further develop your brand and expand your customer base.
Equipment required for the performance
The following is a list of equipment you are considering preparing for your booth:
Canopy
Protecting your art is very important! From the beginning, it didn’t need to cost a lot. You can start with EZ-Up or Eurmax tents (as long as you know that their walls are waterproof and not waterproof).
Make sure it has a white canopy! I know that many artists have colorful canopies to help them stand out, but this color is poorly reflected in their artwork. The white filter can emit the best light! Instead, keep the color of the wall. Here are some options:
- Simple tent
- Eurmax Ez pop-up canopy
- Trim Canopy
If you plan to display your artwork on a fixed schedule, then I suggest investing in Trimline Canopy. They are completely waterproof, have the best wind resistance, have a service life of decades, and are easy to customize. Their support team is also the best. (Very important!)
Cover additional components
You don’t need to get all the information at once. Here are the add-ons you may want to invest in some custom booths:
door
French wall
Awning
Lighting (for indoor performances)
wall
If you are looking for a wall where artwork can be hung, then ProPanels (pictured above) has the most professional appearance. I like these panels, but they are not available because they are too big for my minivan. So I went to the white MeshPanels of the booming company. The grid display panel is a durable panel that is easy to roll up and can be transported in a duffel bag.
Both ProPanels and MeshPanels can have multiple colors. My walls are more than 10 years old, and they were only white at that time, so I made my own burlap covering to cover my MeshPanels, but now you can also buy colored coverings!
ProPanel display panel
- Flourishing grid plate
- Display cover
- Displays2go grid wall panel
In order to hang your artwork, I suggest using old fashioned curtain hooks.
Heavy object
It is very important to reduce the weight of the tent! I have seen a strong wind destroy the tent. (Visit this post to understand your destructive power!) To protect your cover from the wind, you can buy sandbags from companies such as EZ-Up, buy anchors from Flourish Co., and even use fitness weights at home. I made my own weights (as shown in the picture above), they are easy to store, attach to my canopy, and do not cause dazzling. To make your own weight, all you need to do is:
- PVC pipe
- 2 capsules
- specific
- Big eye hook
- Bungee cord
Trash cans and shelves
If you need a trash can for painting and printing, you can customize the trash can or buy a trash can from the following locations:
- ProPanels box
- Creative trademark display
Shelf
I saw many different types of shelves at the exhibition. Everyone has different ways to solve this need. If you decide to use the ProPanel wall, you can add yourself to it! The biggest advantage of ProPanel shelves, trash cans, and tables are that they are easy to separate and fold up for transportation.
- ProPanel shelf
station
The table is very useful for storing important tools and materials for the exhibition. I highly recommend the ProPanels desk because of its durability and foldability for easy transportation. They are available in two sizes.
- Professional panel desk
chair
I strongly recommend sitting on the director’s chair 30 inches high. Their sitting position is higher than the average sitting position of the folding chair, which is very important when you are talking with customers. If you sit too low, customers will feel uncomfortable. You want to stand with or stay consistent with customers. Here are a few chairs to check out:
- Wooden director’s chair
- Aluminum director’s chair
Banners and signs
After confirming the booth settings, the next important item to be added is a banner or a sign with your name. I ordered several banners from Vista Print and then customized them according to my needs. There are many places to order banners, here are some:
- Vista print banner
- sign
- Cheap banner
Getting the right equipment and knowing how to use it will make your handicrafts stand out from the crowd. With a little imagination, these techniques will create a handicraft booth, which is visually appealing and helps you profit.
First thing first
The first thing you need to do is to buy the right equipment. Get the tent you want by understanding the standards of the festival you plan to participate in. Most of the cheap, light and easy to transport tables you can buy are usually not high enough.
You can use them anyway, but adding some PVC pipes to your legs can make them about a foot and a half, which will make customers easier and visually attract customers to view your products. You should always carry a chair with you and decide where to sit.
Sitting back, but staying visible is a good way to solve customer problems without frightening timid shoppers. Prepare all signs and any supplies or tools that may be required for the performance.
Create outstanding displays
Your handicraft booth needs to have its own feelings and themes to be different. Use fonts that represent the product’s feel on the signage. Choose fabrics and materials suitable for your product. Use portable shelves or other decorative display items to make your table even taller. Many handicraft fairs expect you to cover the entire table with fabric.
You can purchase pre-made covers to achieve this effect or create your own. Whiteboard material is an inexpensive and effective solution for creating your own table cover. You can buy many exquisite display items from retail fixtures companies. Remember, all the items you use in craft booths, including displays, products, equipment and consumables, are things you have to look around.
Before buying, remember the weight of certain objects (such as shelves and tables). Keeping your handicraft booth simple and light will help you save time and effort in selling.
Practice makes perfect
With the tent and all other equipment, you should simulate the layout of the handicraft booth. You can set up a tent in the yard to get a complete feel of the handicraft booth, or just put tape on the market and then put tape in the house.
How to impress shoppers in seconds?
You may be wondering if all these jobs are worth it?
If you want to make 5000-10000 dollars in a show weekend, yes!
Don’t expect an excellent booth outside the door. This is a process. It takes time to figure out what is the best-selling item, how to best display your artwork, how to talk to customers, and how to customize the booth to meet your needs.
My best advice is to start entering the show and criticize it after each show. Find out what works and what doesn’t. Then, after each performance, start making small adjustments. If you continue to do the same thing, then you will continue to get the same results. I have been doing it for a long time, but I still criticize myself and make changes after each performance.
Remember everyone’s love for art exhibitions is to discover a unique kind of handmade work! You need to be original and practical. Design a booth to display the booth in an orderly manner without causing confusion or overwhelming. You have to impress shoppers in seconds and hope they can enter your booth. From there, you can sell artwork!